Blog
How to Make Sure the M57 Intake Manifold Is Leak-Free (with free DXF files)
When you’re tuning an M57, a smoke test is mandatory.
But if you really want to know whether your intake manifold can handle real boost pressure, you need to go further — pressure-testing the manifold itself.
The Problem
The M57 intake manifold isn’t a single big chamber.
It has 12 outlets going to the head — six square and six round — plus:
- one main inlet from the anti-shudder valve, and
- one MAP sensor port on top.
When you try to pressurize it, air leaks out of every hole.
You can’t seal it with tape or plugs — it’s not possible to build pressure without custom block-off plates.
I already own a proper smoke tester (and you should too — mandatory tool when doing any tuning or mechanical work on an M57), but smoke testing only happens around atmospheric pressure.
I wanted to see what happens at real boost, where cracks open up and plastic starts flexing.
The Solution: Custom Steel Block-Off Plates
So I built a full set of steel block-off plates to seal the manifold completely.
Plate 1 — Head side
- Covers the 6 square ports to the cylinder head.
- Weld six small tabs onto the plate and bolt them into the swirl-flap screw holes. Without these tabs, the plate will lift under pressure and leak.
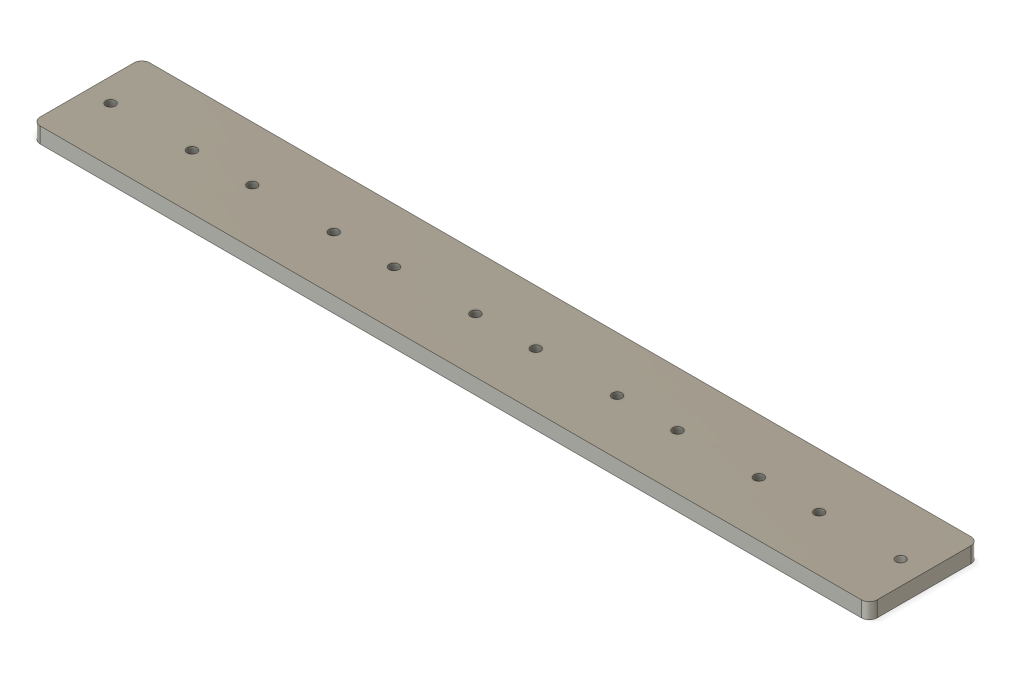
Plate 2 — Secondary side
- Mark and drill two holes so it lines up perfectly with the manifold flange.
- This plate closes the 6 round ports and keeps internal pressure distributed evenly.
Plate 3 — Anti-shudder valve inlet
- Close the main inlet using a plate with a center hole for a Schrader valve.
- You’ll likely need to enlarge the hole slightly to fit the valve securely.
- This is where you’ll pressurize the system.
The MAP sensor was left in its port; part of this test is making sure it would stay in-place while taking big boost.
2mm thickness for all plates is enough.
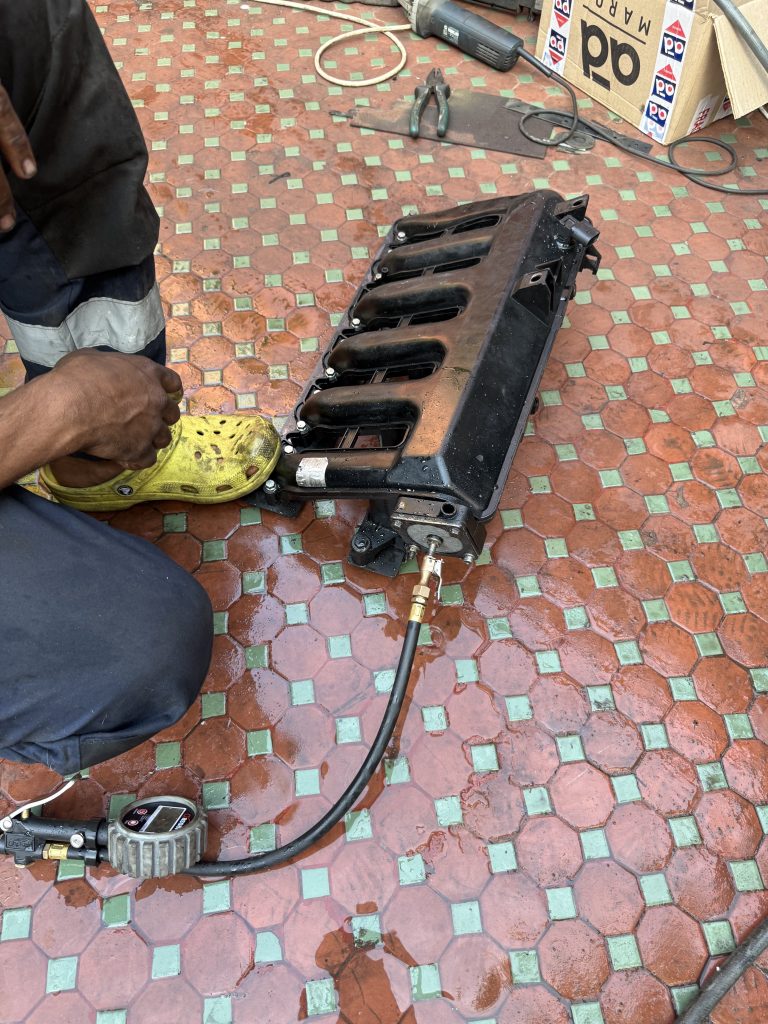
The Test Setup
One plate carries the tire-style Schrader valve.
I didn’t bother adding a separate pressure gauge; I just used the one on my tire inflator.
That turned out to be a mistake — the water inside the manifold pushed moisture back into the inflator and fried its electronics.
Safety tip:
Before you pressurize, fill the manifold with as much water as possible.
If it ever explodes (and a plastic M57 manifold can), you don’t want razor-sharp shards flying into your face.
The water acts as both ballast and shrapnel trap.
The Result
With all three plates bolted on and the system filled with water,
I could safely pressurize the manifold to realistic boost levels and check for leaks around the weld seams, MAP boss, and ASV connection.
The test proved that my manifold holds pressure perfectly —
and the next time I see “rail pressure deviation” or “air mass deviation,” I know the intake side isn’t the problem.
Why It’s Worth Doing
Pressure-testing this way eliminates guesswork.
No need to wonder if the swirl-flap holes are sealed or if the EGR block-off gasket is leaking.
It’s cheap, quick, and if you build the plates once, you’ll use them for every manifold you touch in the future.
Small project, big peace of mind.
Exactly the kind of garage engineering that keeps an M57 alive at more than 3 bar.
Plate 1
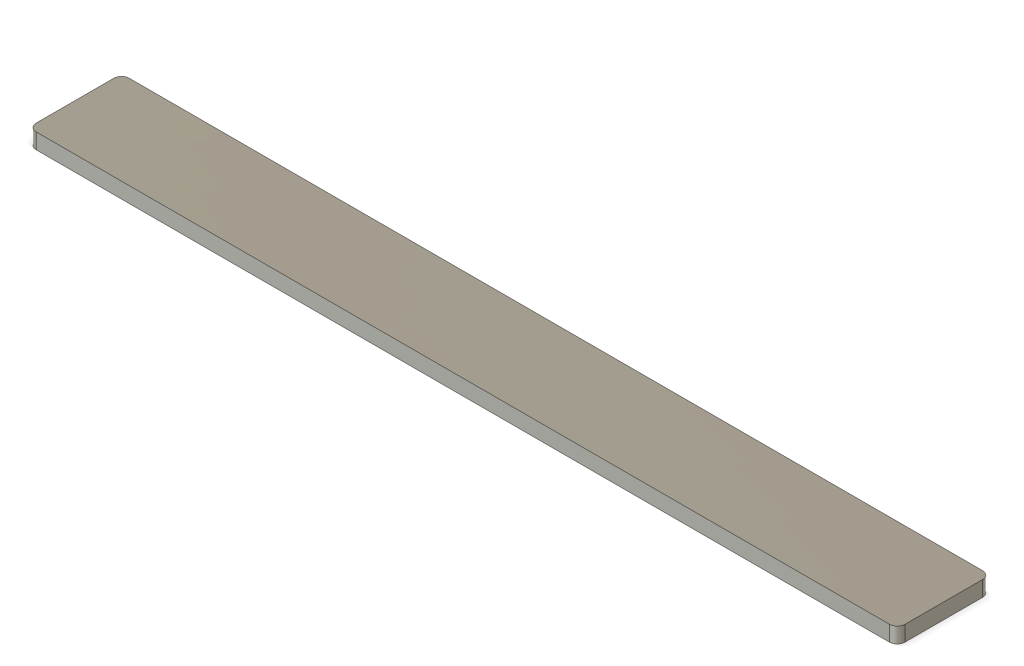
Plate 2
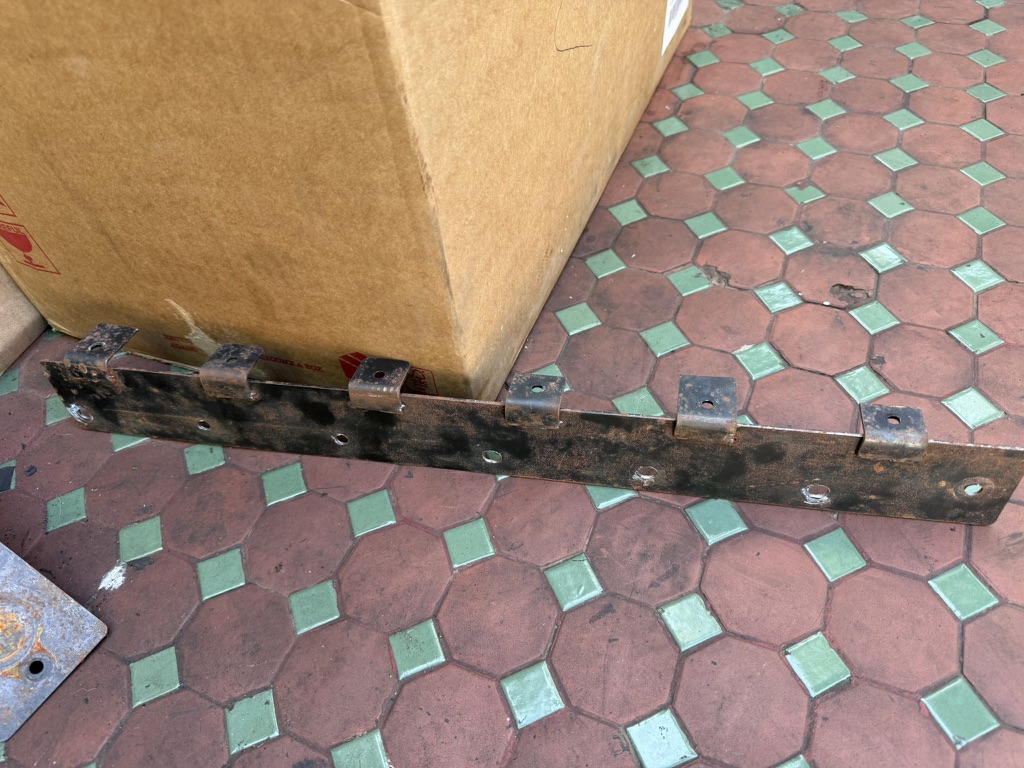
6 tabs were bent and welded to hold the plate to the swirl flaps ports; without this it woudl lift.
A better design would have been making them part of the laser cut file and only needing to bend them. LMK if you want me to update the file!
Plate 3

Plates installed